
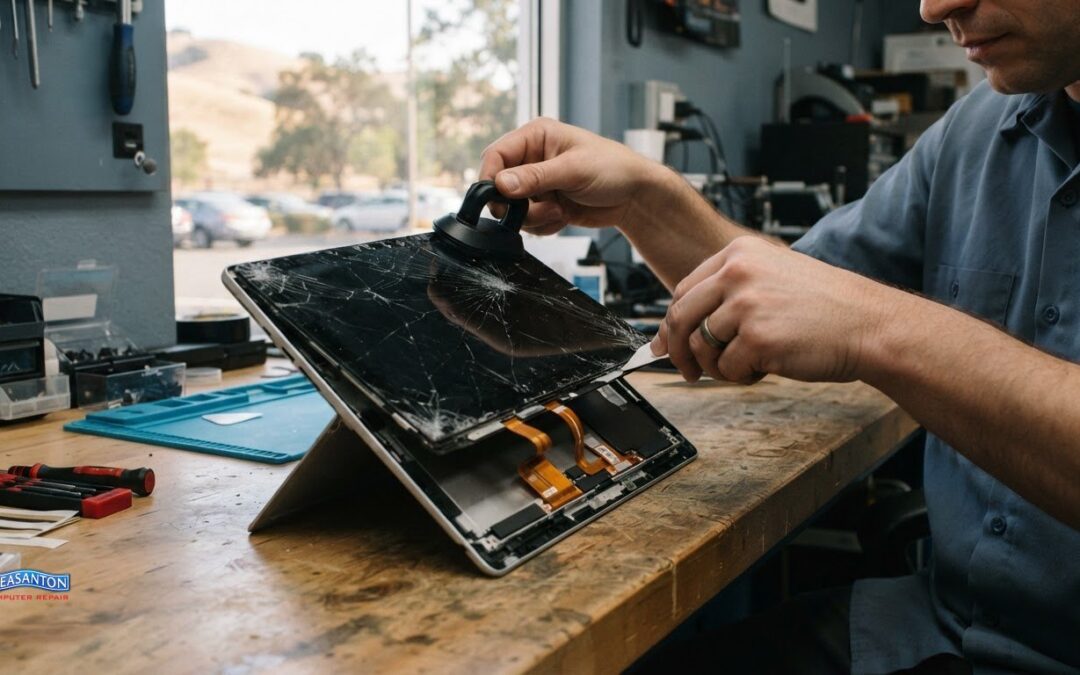
A cracked Surface Pro screen can be harder to replace than it looks. Surface Pro screen replacement in Livermore involves carefully separating a bonded display, and reported removal times range from about an hour and a half to several hours. Rushing can damage the screen or device, so a DIY repair is not always the simplest option.
Before choosing a repair option, it helps to understand what the process involves and why removal can be tricky. This guide explains how the screen is separated and replaced, what to consider before attempting the work yourself, and where to find in-person support near Livermore. It also explains why replacement-screen and shipping costs vary, and why a parts price is not the same as a repair quote.
Key Takeaways
- Surface Pro screen removal is delicate because the display is bonded in place; understand the repair steps before deciding whether to attempt it yourself.
- Learn what to consider when arranging in-person support near Livermore and bringing your device in for repair.
- See how replacement-screen compatibility and shipping can affect parts costs and delivery time.
- Back up important files and prepare your Surface Pro before handing it over for screen repair.
- Understand how careful installation and post-repair checks help address potential touch and display problems.
Cracked-screen replacement process
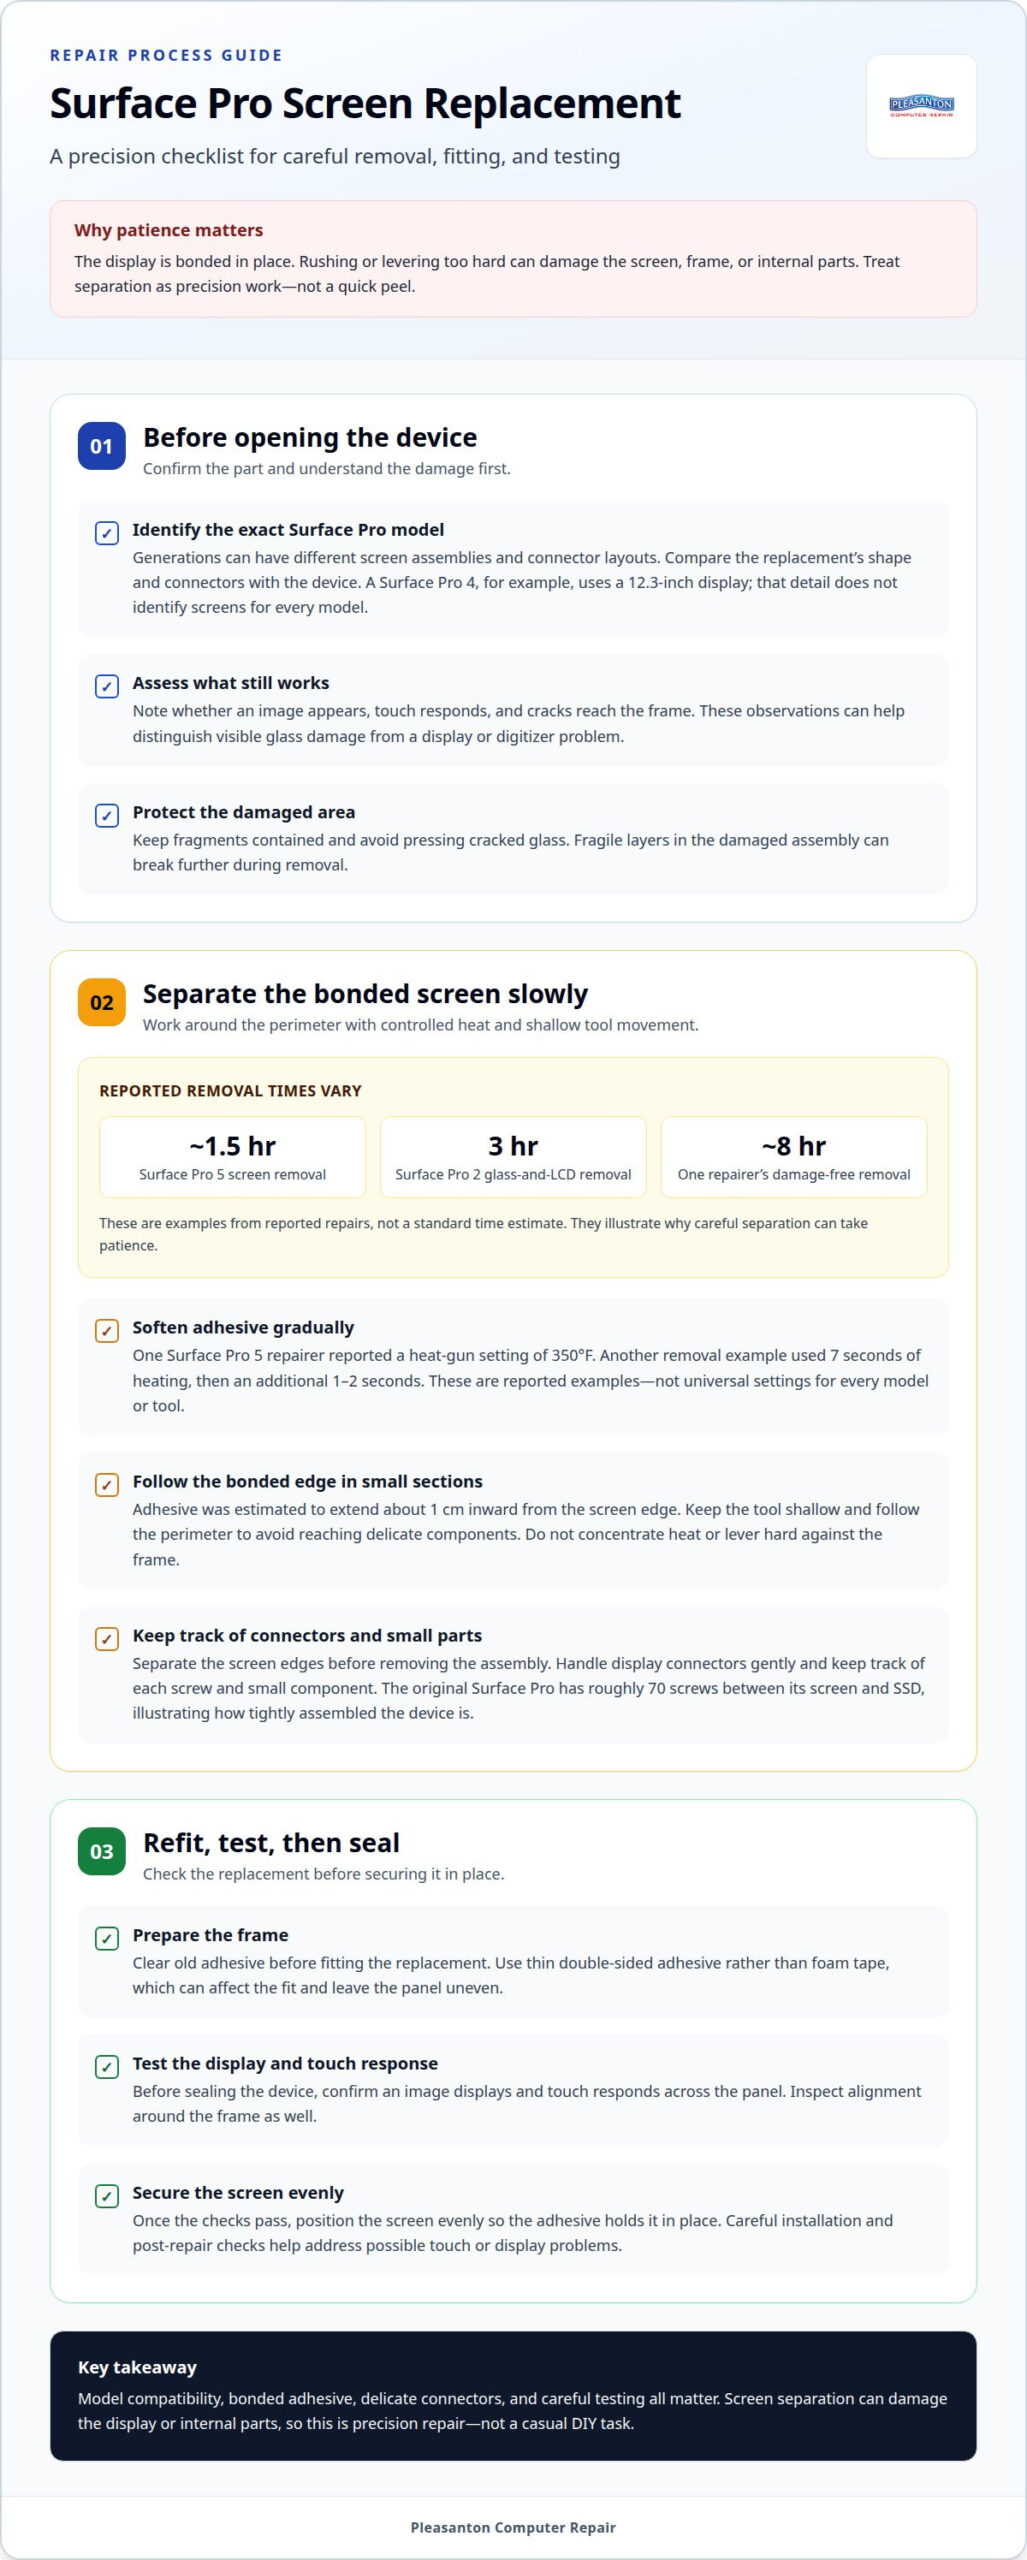
- Identify the exact Surface Pro model before ordering a display. Screen assemblies and connector layouts vary across generations, so a part intended for another model may not fit. Record the model information and compare the replacement assembly’s shape and connectors. A Surface Pro 4, for example, uses a 12.3-inch display, but that specification does not identify screens for every Surface Pro.
- Assess the damage before opening the device. Note whether an image appears, whether touch responds, and whether cracks reach the frame. These observations can help distinguish visible glass damage from a display or digitizer problem. Keep fragments contained and avoid pressing cracked areas. Fragile layers in the damaged assembly can break further during removal.
- Plan for a slow separation, not a quick peel. The original Surface Pro has roughly 70 screws between its screen and SSD, illustrating how tightly the device is assembled. A reported Surface Pro 2 glass-and-LCD removal took 3 hours; another repairer spent about 8 hours removing a screen without damage. These examples show why patience matters.
- Soften the screen adhesive gradually, then lift the assembly with controlled pressure. One Surface Pro 5 repairer reported using a heat gun set to 350°F. That is an example from a repair, not a universal setting for every model or tool. Another removal involved heating for 7 seconds, then adding another 1-2 seconds. Avoid concentrating heat or levering hard against the frame.
- Work around the bonded edge in small sections. Adhesive was estimated to extend about 1 cm inward from the screen edge, so cutting or prying too deeply can reach delicate components. Keep the tool shallow and follow the perimeter. A Surface Pro 5 screen removal was reported to take about an hour and a half, even with careful technique.
- Separate the screen edges before removing the damaged assembly. Handle display connectors gently and keep track of each screw and small component. Before fitting the replacement, clear old adhesive from the frame. Use thin double-sided adhesive rather than foam tape, which can affect the fit and leave the panel uneven.
- Test the replacement before sealing the device. Check that an image displays and touch responds across the panel, then inspect alignment around the frame. Once those checks pass, secure the screen evenly so the adhesive holds it in position. Because separation can damage the display or internal parts, Surface Pro screen replacement in Livermore is precision repair, not a casual DIY task.
In-person support availability
- Choose a drop-off location that fits your trip from Livermore. The Pleasanton location is at 915 Main Street Suite A, Pleasanton, CA 94566. The Danville location is at 15 Railroad Ave #155, Danville, CA 94526. Bring the Surface Pro in a protective sleeve, and avoid pressing on cracked glass during transport.
- Book your Pleasanton drop-off before setting out. Use the online drop-off booking form to arrange the visit. This gives you a clear next step before traveling with a damaged device. Keep the Surface Pro model and a short description of the screen problem ready for the handoff.
- If Danville is more convenient, note whether the Surface Pro powers on, displays an image, and responds to touch before arranging a visit. Mention specific symptoms, such as dark areas or touch failure near one edge. These observations help describe what changed after the screen cracked.
- Arrange Brentwood visits by appointment only. If you’re planning to visit from Brentwood, schedule the appointment rather than arriving without one. Keep the device’s model information and a brief symptom list available when arranging the visit. Note any visible frame damage or loose screen edges along with the cracked display.
- Prepare a concise handoff note before leaving home. Include when the screen was damaged and what still works, such as image display or touch input. Mention other symptoms, such as unexpected shutdowns, only if you observed them. A clear account can help distinguish screen damage from another device issue.
- Keep accessories and destination details organized. Remove the Type Cover and other detachable accessories unless they relate to the screen problem. Store them separately, and write down what you’ve removed. For a Pleasanton visit, use 915 Main Street Suite A, Pleasanton, CA 94566; for Danville, use 15 Railroad Ave #155, Danville, CA 94526.
- Use the listed phone number, (925) 460-5200, if you need to discuss your drop-off. An in-person visit lets you hand over the Surface Pro directly and explain the symptoms face to face. For Livermore residents, Pleasanton is a nearby drop-off option; Brentwood visits require an appointment.
Replacement screen costs and shipping
- Identify the exact Surface Pro model before comparing replacement parts. A screen listing must match the device’s generation and assembly, not simply say “Surface Pro.” For example, a Surface Pro 4 display is listed as 12.3 inches with a 2736×1824 resolution. Those specifications help identify that model, but they don’t establish compatibility with other generations.
- Compare what each screen assembly includes. One listing may describe a screen and digitizer together, while another may describe the display component differently. The digitizer handles touch input, so the assembly contents matter when both image and touch functions need repair. Check model compatibility and included parts before comparing totals.
- Separate the listed replacement-part cost from the full repair cost. The display is only one part of the job: model compatibility, assembly type, shipping, and the work needed to remove the damaged screen all affect the total quote. A part-only price does not represent the cost of a completed repair.
- Account for shipping before choosing a part. One reported purchase of a Surface Pro digitizer and screen assembly took 2-4 weeks to arrive. Treat that as an example, not a delivery estimate for every order. Shipping duration can depend on the seller’s handling, the part’s origin, and carrier transit.
- Compare the delivered part, not just its listing price. Account for shipping, the assembly description, and compatibility with your device model. A lower listed price may not mean a lower total once delivery is included. Keep the listing details handy so you can compare the same screen type and model fit.
- Request a repair quote based on the specific device and damage. The price depends on the Surface Pro model, replacement assembly, shipping, and repair work. A cracked panel with a damaged frame may need different work from a screen with glass damage alone, so describe the visible condition accurately.
- Plan around the part’s arrival separately from the repair itself. A reported 2-4-week shipping window shows why sourcing can affect the overall schedule, even before screen removal begins. Don’t treat an online parts listing as a repair appointment or completion estimate. Confirm the device model and compare shipping details before making a purchase decision.
These reported amounts are not confirmed prices for every model or repair. They also describe different things: one is a replacement-parts purchase, while the other is a screen replacement job. Keep that distinction in mind when assessing a quote, and check what it includes before comparing it with either report.
Use the reports as reference points, not as a promise of what your repair will cost. Find out whether the price includes a compatible screen and digitizer assembly, installation, and shipping, then compare it with your device’s model and damage. A different quote does not automatically mean the price is unreasonable: the part and repair requirements may differ. A quote based on your specific device is the more useful basis for deciding.
How to back up and prepare Surface Pro for screen repair
- Back up important files before handing over a Surface Pro. Use OneDrive, an external drive, or another backup method available to you. Include documents, photos, desktop files, and downloads. A cloud icon alone does not confirm that every file has finished syncing, so open OneDrive and check that key files appear there.
- Check that you can open the backup. From another device, sign in to the same account and open a recent document or photo. If you used an external drive, connect it to a computer and browse several folders. An inaccessible backup will not help if the Surface Pro needs additional work.
- Save important browser and app information separately. Confirm that bookmarks, work files, and app projects sync or have copies outside the Surface Pro. For example, move a presentation saved only in Downloads to OneDrive or an external drive. Note any apps that require account sign-in after repair.
- Make sure you can access your Microsoft account. Keep sign-in details private, and do not attach a note with passwords to the device. If you use a password manager, confirm you can open it from another device. This helps you restore access to synced files and familiar Windows settings afterward.
- Record the device’s identifying details and current symptoms. Note the Surface Pro model, whether it powers on, and whether the display shows an image. Add examples such as flickering, dark areas, or touch failure near the crack. These notes make it easier to describe the issue without relying on the damaged screen.
- Remove accessories that are not needed for repair. Detach the Type Cover, USB devices, headphones, and any microSD card. Keep small items together in a separate pouch rather than loose beside the Surface Pro. Write down which accessories you removed so they do not get confused with the device.
- Shut down the Surface Pro before packing it. Disconnect the charger and make sure the device is powered off, not asleep. Place it in a padded sleeve or protective case, keeping pressure away from the cracked display. Avoid wrapping loose glass fragments directly against fabric.
- Prepare a concise handoff note with your backup status and repair observations. Include the model, account access considerations, removed accessories, and any issue beyond the cracked screen. For example, mention whether the device shut down unexpectedly before the damage. Keep the note with the Surface Pro, but leave passwords and recovery codes out.
What are the risks of replacing a Surface Pro screen, including touch or display issues?
- Separate the glass slowly to reduce the chance of spreading a crack. A pry tool pushed too deeply can damage layers beneath the visible glass. Heat and pressure must be controlled around the Surface Pro’s bonded edges. Stop if the panel bends, resists lifting, or begins to separate unevenly.
- Protect internal components while loosening the display assembly. A tool that slips past the screen edge can reach cables or other parts. Keep movements shallow and deliberate. For example, work along one edge rather than levering sharply from a single corner. A damaged connector can cause problems beyond the original crack.
- Match the replacement to the exact Surface Pro model. A screen that physically fits may still have a mismatched connector or touch layer. Check the model and the assembly details before installation. A Surface Pro 4 display specification, for example, cannot establish compatibility with a different generation.
- Test touch input across the replacement panel before sealing it. A responsive center does not prove that every edge works. Open a drawing or notes app and trace slowly across the screen. Look for missed strokes, dead areas, or taps that register elsewhere. These symptoms can point to a digitizer, connection, or fit problem.
- Inspect the image for defects before final bonding. Check for flicker, dark patches, unusual lines, or areas that fail to light. Compare the display at different brightness levels and angles. If the image changes as the panel moves, stop testing and inspect the connection rather than pressing harder.
- Check screen alignment and adhesive contact around the entire frame. Uneven pressure can leave a raised corner or visible gap. A loose fit may let dust enter and stress the replacement panel. Pressing hard to correct a poor fit can crack the new screen, so correct the alignment before securing it.
- Record existing symptoms before repair and compare them afterward. Note whether the original Surface Pro had touch failure, flicker, or a dark area. This baseline helps distinguish an existing fault from a new one. After installation, repeat the same touch and display checks before considering the repair complete.
- Choose skilled help if screen separation or testing feels uncertain. A Surface Pro combines a bonded display with delicate internal connections, so a rushed attempt can add damage. For a careful screen assessment, request screen repair support before attempting a difficult removal yourself.
When planning the job, weigh tool costs against the risk of damage. If the screen resists separation, stopping is safer than continuing with improvised leverage.
Replacement specifications should be checked as well as physical fit. The PEHDPVS replacement display has a 13.5-inch screen and a maximum resolution of 2256 x 1504 pixels, and it uses LED LCD technology. Those specifications describe that replacement, but do not by themselves confirm that it matches a particular Surface Pro model, connector, or touch layer. Confirm compatibility and test the installed panel before sealing it, since a suitable image specification cannot rule out touch or connection faults.
Pleasanton Computer Repair: PC / Mac Screen Replacement
Pleasanton Computer Repair provides PC / Mac Screen Replacement for devices with cracked or damaged displays. If separating a bonded Surface Pro screen feels too risky, professional repair can help with delicate removal, replacement, and display checks. Share the model and symptoms, such as unresponsive touch or image problems, so the repair need is clear.
For in-person support, the Pleasanton location is at 915 Main Street Suite A, Pleasanton, CA 94566. Call (925) 460-5200 to discuss your Surface Pro screen repair. Contact Pleasanton Computer Repair when you’re ready to arrange the next step.
Choose a repair path that protects your device
Before deciding how to proceed, consider your comfort with the risks of handling a bonded, delicate display. A DIY attempt may suit someone with careful repair experience and model-specific parts. If you would rather leave the screen separation and testing to a repair service, arrange the next step with the device model and symptoms ready.
For Surface Pro screen replacement in Livermore, Pleasanton Computer Repair provides PC / Mac Screen Replacement. The business also handles iPhone and iPad Repairs and Virus Removal. Describe the Surface Pro problem and what you need from the device to start the repair conversation with your priorities in mind.
Contact Pleasanton Computer Repair to discuss your screen repair. Your next step can be straightforward, and you can move toward getting back to the work, study, or everyday tasks your Surface Pro supports.
Frequently Asked Questions
Which Livermore repair shops service Surface Pro screens and what are their addresses and hours?
Pleasanton Computer Repair provides PC / Mac Screen Replacement at 915 Main Street Suite A, Pleasanton, CA 94566. Store hours are Monday – Friday: 9:30 am – 5:00 pm; Saturday: 9:00 am – 1:00 pm; Sunday: Closed. Weekday appointments are available, and Saturday visits are by appointment only. For Livermore residents, the Pleasanton location is an in-person drop-off option.
How much does Surface Pro screen replacement cost in Livermore?
The repair cost depends on the Surface Pro model, compatible screen assembly, parts availability, and work required. A parts listing or shipping charge alone does not represent the cost of a completed repair. For a useful quote, provide the model and describe the damage, including whether touch works, the display shows an image, or the frame is bent. These details help clarify the parts and labor involved.
How long does Surface Pro screen replacement take in Livermore?
Pleasanton Computer Repair states repair turnaround is 24-72 hours depending on the issue and parts availability. The time needed can depend on identifying the correct screen assembly and completing installation and display checks. If a compatible part needs to be sourced, shipping can affect the overall schedule before repair work begins. Share the Surface Pro model and symptoms when arranging service to help describe the repair needed.
What warranty do Surface Pro screen repairs in Livermore include?
A Surface device outside its Limited Warranty receives a 90-day service warranty after service.
