
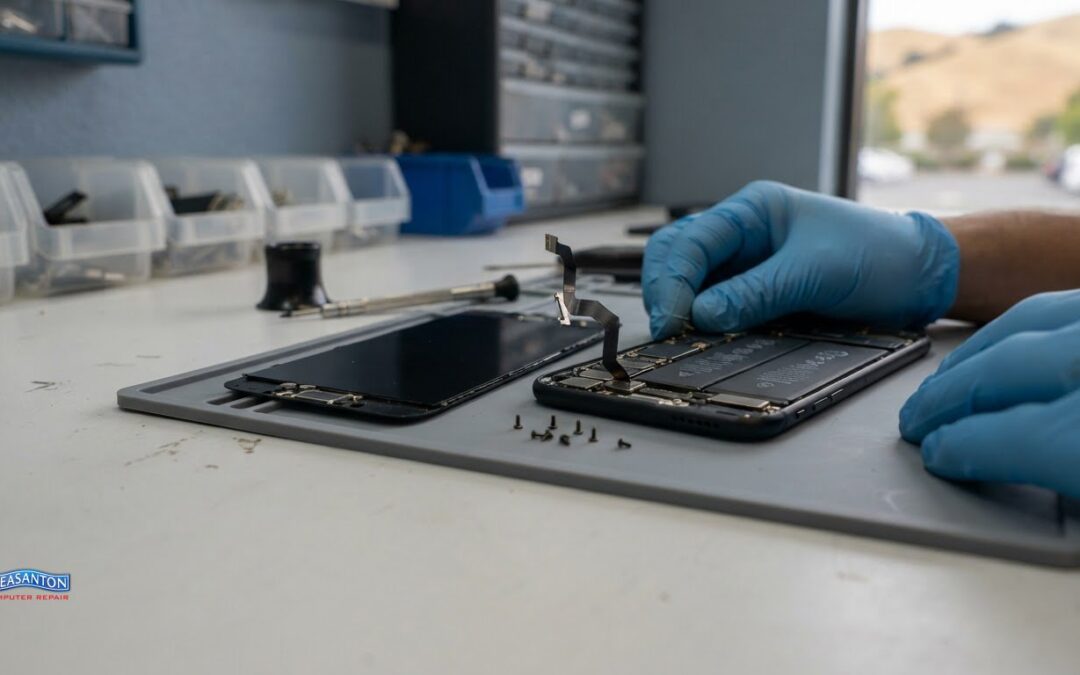
The cheapest-looking screen repair can become the costliest if one slip damages a cable, battery, or display. The risks of DIY iPhone screen replacement include more than a failed repair: extra parts or professional recovery may add to the bill, and a poorly fitted screen can affect touch response and display features. A repair quote depends on the phone model, the damage, and the parts involved, and is provided after a quote request.
It’s understandable to consider a DIY kit when a cracked screen needs attention. Weigh the potential savings against the risk of further damage, as well as the time and tools the repair may require.
This guide explains the risks, from delicate internal components and battery hazards to possible warranty consequences and screen-quality issues. It also covers when a DIY repair may be manageable and when professional iPhone Repair is the more sensible next step.
Key Takeaways
- Account for more than the replacement part: missing tools, damaged components, or repeat purchases can raise the total cost of a DIY repair.
- Take care around flex cables and connectors; a small mistake can affect touch response, display function, or other parts of the phone.
- Understand the battery hazard before opening the device, and stop if the repair goes wrong rather than risking further damage.
- Consider how opening the phone could affect warranty coverage before deciding whether to proceed yourself.
- Screen quality and installation influence the everyday experience, including touch responsiveness and features such as True Tone.
1. Damage to flex cables and connectors during opening
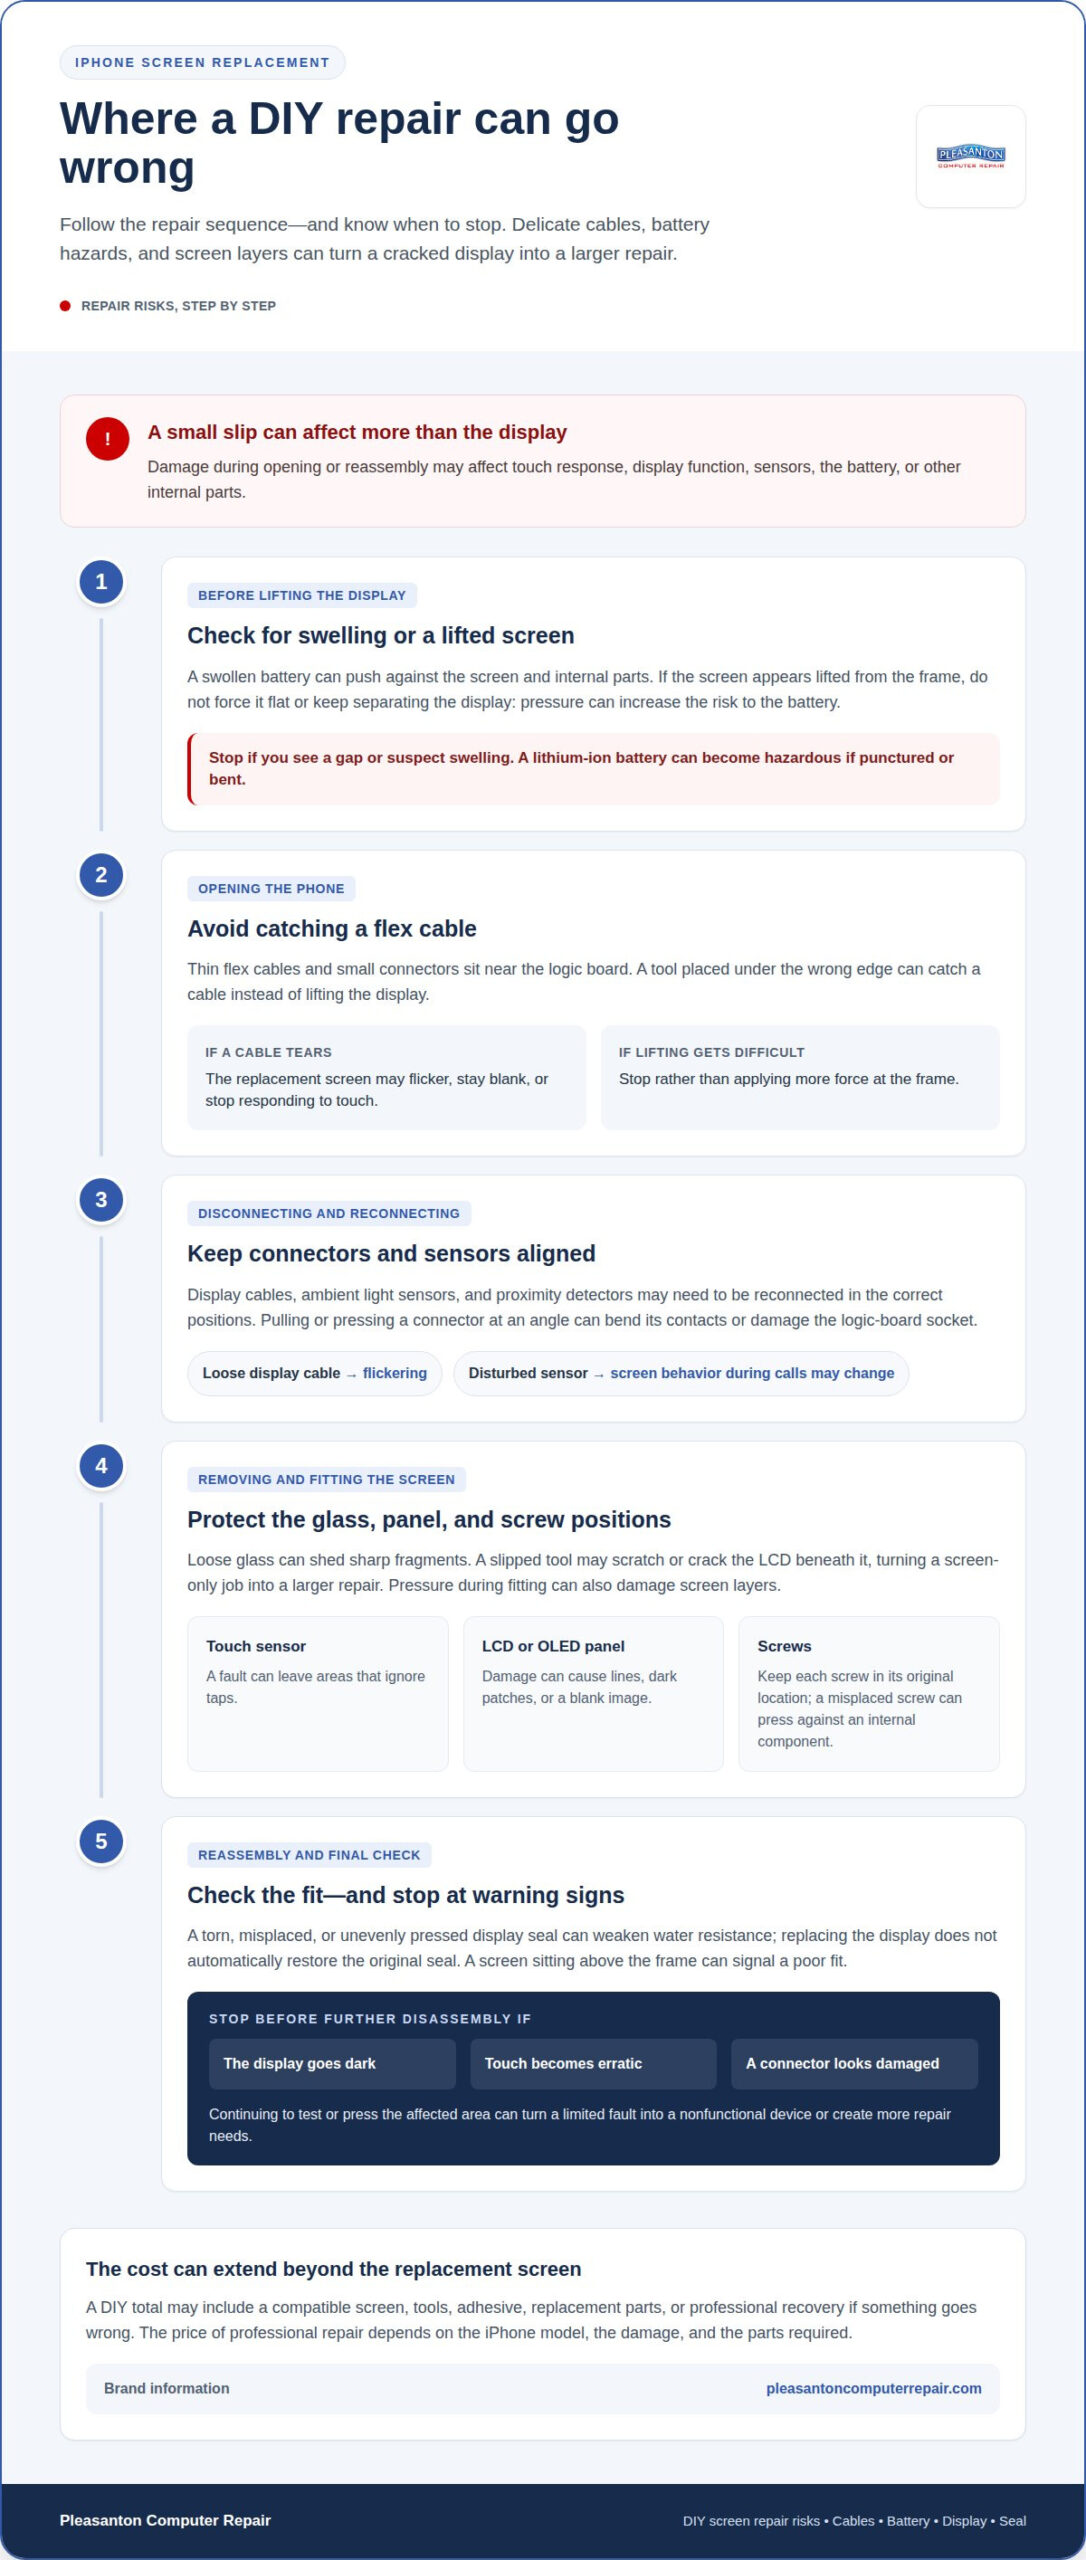
An iPhone screen replacement exposes delicate components before the new display is installed. Thin flex cables and small connectors link the screen to the device near the logic board. During opening, a tool slipped under the wrong edge can catch a cable instead of lifting the display. A torn cable may leave the replacement screen flickering, blank, or unresponsive to touch. Even a connector that looks intact can loosen if pulled or pressed at an angle.
Reassembly requires care, too. Display cables, ambient light sensors, and proximity detectors may need to be reconnected in the correct positions. Pressing down on a misaligned connector can bend its contacts or damage the logic-board socket. A poorly seated display cable, for example, can cause flickering, while a disturbed sensor may affect screen behavior during calls. A misplaced screw can press against an internal component, so keep each screw in its original location.
A display combines a touch sensor, a digitizer, and an LCD or OLED panel. These parts work together, so damage to one layer can affect the entire screen. A touch-sensor fault may leave areas that ignore taps; panel damage can cause lines, dark patches, or a blank image. Even a replacement that looks intact can perform poorly if pressure during fitting damages its layers.
Removing cracked glass creates another risk: the LCD beneath it can be damaged while lifting the screen. A tool slipped under the glass may scratch or crack the panel, turning a screen-only job into a larger repair. Broken glass can also shed sharp fragments as the display separates. If lifting the screen becomes difficult at the frame, stop rather than applying more force.
The display seal matters after reassembly. If it is torn, misplaced, or pressed unevenly, the iPhone’s water resistance may be weakened. A screen that sits above the frame can signal a poor fit, while a damaged seal reduces protection against moisture. Replacing the display does not automatically restore the original seal.
There are physical and device-safety risks, too. Loose glass can cut a finger, and a slipped tool can damage a cable, camera, battery connection, or logic board. If the display goes dark, touch becomes erratic, or a connector looks damaged, stop before disassembling the phone further. Continuing to test or press the affected area can turn a limited fault into a nonfunctional device or create more repair needs.
2. Upfront costs of DIY versus professional screen repair
A DIY kit’s purchase price is only the starting point. The total may include a compatible screen, opening tools, adhesive, and replacement parts if something is damaged during installation. Some kits include basic tools, but missing or unsuitable tools can make the job harder. If the first screen breaks during fitting, another part adds to the expense before the phone works again.
Which iPhone models are hardest or riskiest to repair at home? Newer models can be especially challenging because their components are fragile and tightly packed. A small mistake near the battery, camera, or logic board can turn a screen replacement into a broader repair. The model matters, as do the phone’s condition and the repairer’s experience.
Professional repair has a different cost structure. Technicians use repair tools and parts selected for the device, rather than relying on a general-purpose kit. Diagnosis and careful reassembly can also help identify problems beyond the visible crack. The price depends on the model, damage, and parts required. Pleasanton Computer Repair provides a quote after assessing the repair.
Parts and warranty coverage also affect the comparison. DIY kits may use lower-quality glass or leave out a useful tool, and may offer little protection if the repair goes wrong. Coverage varies, so consider what a warranty applies to, including the parts or work that may need attention. Compare those terms as part of the repair’s overall value.
Time is another real cost. A careful repair involves opening the device, transferring or reconnecting components, and testing the display. A mistake can mean repeating those steps, replacing a damaged part, or paying for professional recovery or reassembly. For example, a screen that powers on but responds unevenly may require more troubleshooting than a simple parts swap. A professional repair avoids buying tools for a single job, though turnaround depends on the repair and device.
DIY may make sense for someone with repair experience, suitable tools, and a clear understanding of the model’s internal layout. If a fragile cable or connector already looks damaged, added trial-and-error can increase the final cost. For help weighing a repair, explore iPhone screen repair as a professional option.
3. Lithium-ion battery puncture, swelling, and fire risks
An iPhone battery sits close to other internal parts, so screen removal can expose it to accidental pressure. A tool that slips beneath the display may press against or bend the battery instead of releasing the screen. Lithium-ion batteries can become hazardous if punctured or bent during repair. The risk is not limited to the battery itself: a slip can also damage nearby cables, connectors, or the replacement display.
Take swelling seriously. A swollen battery can push against the screen and other components, crack the display, or put pressure on internal connections. It can also catch fire. If the screen appears lifted from the frame, forcing it flat may increase pressure on the battery. Treat a visible gap as a reason to stop, not to press harder or keep separating the display.
Battery removal has its own challenges. iPhone batteries are installed and sealed in a way that can make them difficult to remove without repair experience. Trying to pry one out with a sharp tool can puncture it; twisting or bending it can create another hazard. Don’t treat the battery as an obstacle to work around during screen replacement. If it looks swollen or becomes damaged, stop rather than continuing to handle it.
The U.S. Consumer Product Safety Commission is cited in connection with increasing incidents of fire or swelling linked to mishandled smartphone batteries. Battery safety is a practical concern, not just a risk of damaging the phone. A puncture or short during reassembly can create a serious hazard, while a damaged battery connection may prevent the iPhone from powering on. If the battery has been punctured, bent, or visibly swollen, stop the repair.
Battery and display problems can be mistaken for one another. A screen that lifts, for example, may reflect pressure from a swollen battery rather than a simple adhesive failure. Flickering or a blank display can also follow damage to display cables or connectors, so repeatedly opening the phone may worsen the fault. The same symptom can have different causes, and replacing the screen alone won’t fix a battery problem.
Make the battery a clear stopping point in your decision. If screen removal requires force near the battery, or the battery looks distorted, don’t continue the DIY repair. Pausing can help prevent further device damage and reduce exposure to the hazards of a damaged lithium-ion cell. Protecting the phone’s cables, display, and battery matters more than finishing the repair at home.
4. Potential warranty consequences
Opening an iPhone can affect warranty or AppleCare coverage, so consider the implications before starting a screen repair. A DIY repair on a device that still has coverage may put it at risk. Damage caused during the repair can also complicate a later claim. For example, a torn display cable or damaged connector creates a problem beyond the original cracked screen.
Warranty coverage and AppleCare are distinct, and neither automatically covers every repair outcome. What matters is the plan’s terms and how a new fault relates to the screen replacement. If the phone later develops a charging issue, for example, the cause may need to be distinguished from damage during opening or reassembly. Careful work matters, but it cannot undo damage that has already occurred.
Before starting, identify the coverage that applies to your iPhone and decide whether a DIY repair is worth the potential tradeoff. Keep purchase and repair records together, including when the screen cracked and any symptoms noticed before opening the phone. This information can help distinguish the original fault from problems that appear later. A blank display after reassembly, for instance, may point to a repair-related issue rather than the original crack.
Opening the phone can leave physical evidence of a repair, such as damaged seals, missing screws, or marks near connectors. These details may make it harder to determine whether a later fault existed beforehand. Don’t assume a screen replacement affects every part of your coverage in the same way, or that coverage remains unchanged. The plan terms and cause of the new fault both matter.
If warranty protection matters to you, choose a repair route before removing the screen. Professional repair can reduce the risk of accidental internal damage, though coverage depends on the applicable warranty or AppleCare terms. If you’ve already started and notice a damaged cable, misplaced screw, or screen that won’t sit flush, stop rather than trying repeated repairs. Note the symptoms and where you stopped to give the next technician a clearer starting point.
5. Quality and performance of replacement screens
A screen can look intact and still perform poorly in everyday use. A replacement panel may have dead zones where taps don’t register, or laggy touch response that makes typing frustrating. A message may be easy to read, for example, while some keyboard keys respond inconsistently. Appearance alone doesn’t show whether the touch layer works reliably across the display.
Screen quality also affects how familiar your iPhone feels after repair. A noticeable difference in brightness or color can make photos and text look different from before the damage. You may notice it when comparing the repaired phone with another display or viewing the same image in different lighting. A low-cost part may save money upfront, but poor touch response or an uneven image can leave the repair feeling incomplete.
True Tone is another feature to consider. After an improper screen replacement, restoring it may require specialized tools and calibration software that a DIY repairer may not have. If the feature doesn’t work as expected after installation, changing display settings won’t necessarily fix the underlying calibration issue. Performance depends on more than whether the screen turns on: installation and calibration can affect how well it works with the device.
Before considering a screen repair complete, test the whole display, not just the center. Open the keyboard and tap keys on the left, middle, and right. Drag an icon across the screen to spot breaks in touch tracking. Then view a plain, light background and a dark image to look for uneven patches, lines, or flickering. These checks can reveal faults a quick glance may miss.
Part quality and fit shape the result, too. Some third-party DIY kits may contain substandard glass or lack essential tools, affecting performance and longevity. A sound repair uses a part suited to the iPhone model and fits the screen evenly in the frame. If an edge lifts, touch response falters, or the image flickers after fitting, treat those symptoms as problems to address, not normal tradeoffs.
The clearest takeaway: judge a replacement by function, not appearance or the word “certified” on a listing. A certified repair route doesn’t by itself explain the screen’s quality, touch behavior, or calibration. Compare those practical outcomes, including full-screen touch response and True Tone operation, before deciding that a repair has restored the phone. When screen quality matters, professional screen replacement can help address both the display and its performance.
Pleasanton Computer Repair: iPhone and iPad Repairs
Pleasanton Computer Repair provides iPhone and iPad Repairs for cracked screens, failed touch response, and problems that arise during a DIY repair. If the display stays dark, flickers, or no longer fits flush after reassembly, professional service can help address the issue without further home disassembly. It’s also a practical next step if you’re concerned about screen quality, damaged parts, or the phone’s condition after opening it.
For help with an iPhone or iPad, contact Pleasanton Computer Repair at (925) 460-5200 or visit 915 Main Street Suite A, Pleasanton, CA 94566. You’re welcome to contact Pleasanton Computer Repair to discuss the repair.
Choose a repair path that protects your next steps
A cracked screen can make it tempting to start a repair right away, but the best choice is one that leaves your phone dependable afterward. Consider your experience, the device’s condition, and whether you’re comfortable handling delicate components. Weigh the risks of DIY iPhone screen replacement against the value of a working phone and a repair you feel confident using.
If you’d rather have help, Pleasanton Computer Repair offers iPhone and iPad Repairs. The team also provides PC / Mac Screen Replacement and Virus Removal, helping with other common device problems. You can discuss the screen issue, any symptoms that appeared during a DIY attempt, and the next repair step with the team.
There’s no need to force a repair that has become difficult. Pause, protect the device, and choose the approach that fits your comfort level. Contact Pleasanton Computer Repair to talk through your iPhone repair needs and move toward a working screen with confidence.
Frequently Asked Questions
How Much Does Each Option Really Cost?
A DIY repair’s total cost includes the replacement screen, suitable tools, and any parts needed after a mistake. Factor in your time and the possibility of professional recovery if the phone develops another fault. Professional repair costs depend on the iPhone model, the damage, and the parts used. Compare the full DIY expense with a repair quote, not just the kit’s purchase price.
So, What Next if You Try DIY and It Goes Wrong?
Stop as soon as something seems wrong. Don’t force a stuck screen, repeatedly press a loose connector, or keep powering on a device with visible battery damage. Note what happened and which components you handled, then arrange a professional assessment. For example, telling the technician that the display went blank just after reconnecting a cable can help narrow down the fault and avoid unnecessary disassembly.
What Are the Main Risks of Replacing an iPhone Screen Yourself?
The risks of DIY iPhone screen replacement include damage to display cables, connectors, sensors, or the panel beneath cracked glass. A mistake can also affect touch response, biometric features, or the phone’s seal. Battery damage adds a safety concern. The outcome depends on the device and the repair error, so consider your experience and the phone’s condition before opening it.
Can DIY iPhone Screen Replacement Damage Face ID or Other Components?
Yes. Mishandling paired iPhone components can make Face ID or Touch ID inoperable, while a slipped tool or misaligned connector can affect other internal parts. A screen that lights up, for example, doesn’t prove every sensor connection works correctly. After repair, check biometric unlocking, the front-facing camera, touch response, and buttons, rather than testing only whether the display turns on.
How Does DIY Screen Replacement Affect iPhone Water Resistance?
Opening an iPhone can weaken its water resistance if the display seal is damaged, uneven, or misplaced during reassembly. A screen edge that sits higher than the frame may indicate a poor fit, though appearance alone can’t establish how well the seal works. Don’t assume a replacement restores the phone’s original protection. Treat the seal as part of the repair outcome, not just a cosmetic detail.
What Tools and Skills Are Needed to Replace an iPhone Screen?
A screen replacement requires model-appropriate opening tools, careful handling, and familiarity with internal cables, connectors, and the logic board. Reconnecting display components without bending contacts or pressing on nearby parts takes care. Follow the repair sequence for the specific model, because screw locations and component layouts differ. Without suitable tools and hands-on experience, a small slip can create a larger repair problem.
How Do Screen Quality and Reliability Compare Between DIY Replacement, Apple Repair, and Third-Party Repair?
There isn’t a reliable way to rank quality by the repair label alone. DIY results depend on the screen, tools, and installation; professional results depend on parts, workmanship, and any calibration performed. A professional repair may use higher-quality parts, while a low-quality kit can affect touch response or display performance. Compare screen behavior, fit, feature operation, and the coverage offered for the work.
What Safety Risks Come From Puncturing or Mishandling an iPhone Lithium-Ion Battery?
Puncturing or bending a lithium-ion battery can create a fire hazard, and a swollen battery can press against internal parts or the screen. The U.S. Consumer Product Safety Commission is cited in connection with increasing incidents of fire or swelling from mishandled smartphone batteries. If a battery looks swollen or becomes damaged during repair, stop handling the device and don’t continue the screen replacement.
